Docati 

Request a trial-version now and see for yourself!
Contact us at [email protected].

Quickstart - Exercise 3: Adding images and working with a context-node

Outline

In the previous exercises we worked with just text. In this exercise we will add an image to the template. Also, when using the ForEach we learned about a so-called context-node which made the data queries relative and therefore shorter. The UseContext-placeholder provides similar functionality for regular situations.

Setup

The prerequisites for these exercises are listed on the Quick-Start introduction-page.

This exercise uses the same data-file as the previous exercise. You can download it here: http://static.docati.com/samples/order-basic.xml (you must save it to a local folder on your computer, you need it later).

Steps

  1. We're continuing our work on the previous template. Open the "Order2.docx"-template you created in the previous exercise.
    * If you skipped exercise 2, you can also download it here: http://static.docati.com/samples/Order3-Starter.docx
  2. Now save the template with a new name “Order3.docx”

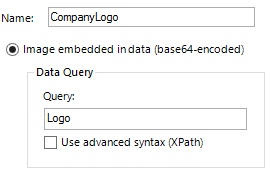
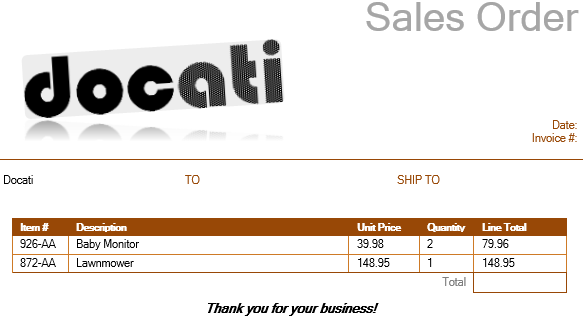
The template contains a company logo (the Docati-logo). In exercise 1 we inserted the name of the company by using a ValueOf-placeholder. It makes sense to add the company logo dynamically as well.

  1. Delete the existing company logo from the template. Position the cursor at the exact location the original logo was located and press the ImageOf-button on the Docati-ribbon. This inserts an ImageOf-placeholder. Name it 'CompanyLogo'.
    * The ImageOf-placeholder already contains an image. This image is only used designtime, allowing you to resize the image, apply effects to the image, etc. When the final document is generated, this image is replaced with the actual image the query specifies.
  2. Resize the image to a similar size as the original company logo. Apply some effects to it (go crazy! ;-)). Modify the configuration of the ImageOf-placeholder: select the first radiobutton (image embedded in data) and set its query to: Logo, eg:

    Configuring the ImageOf

  3. Now generate the document. Depending on the effects you applied to the image, it should look like something like this:

    ImageOf result

    * The image in the final document has the exact same size as the image in the ImageOf-placeholder of the template. This gives you maximum control over the final generated document. However, this also means that the aspect-ratio of the imported image is not respected. It's also possible to have Docati correct the aspect ratio: by locking either the width or the height of the placeholder.
    * In this exercise the image data is located inside the data itself, thus must be supplied for every document to be generated. If there are only a few images used, it’s also possible to place these images inside the templates-folder and refer to them dynamically. You can do so by specifying its filename directly or using a query on the data to determine its filename.

When working with the ForEach-placeholder, you may have noticed the queries for the ValueOf-placeholders did not specify unique element names (for example: there were more than one ProductName-nodes in the XML-document). However, the queries did work, because the ForEach-placeholder supplied a context-node for each row (the Item-node). This caused the queries to be relative to the context-node, meaning ValueOf-placeholders inside the row only searched within/below the Item-node for that row. This is also possible when not iterating through lists.

  1. Place the cursor in the table cell after the “TO” text (use the cursor-key to make sure the cursor is on the correct position). Insert a ValueOf-placeholder and set both its Name and path to: Name. Press ENTER to move to the next line and create more lines for similar ValueOf-placeholders for the fields “Street”, “City”, “State”, “Zip” and “Country”.
    The final result should look like this:

    ValueOf-placeholders with relative queries

    * The Value-Of placeholders are all in place, but since their queries will search the entire data XML, this will result in more than one match (there are several Address-node in the XML). In such case, the ValueOf-placeholder, will render the value of the first matching node. In this case we want to render the billing address.
  2. Use your mouse to select all ValueOf-placeholder you added in the previous step. While they are all selected, click the UseContext-button on the Docati-ribbon. The result should look like this:

    UseContext surrounding ValueOf-placeholders

    * The UseContext-placeholder has been added around the selected area, in this case the set of ValueOf-placeholders. The path specified for the UseContext-placeholder is used as the context-node for all its children (the ValueOf-placeholders).
  3. Set the path of the UseContext to /PurchaseOrder/Address[@Type='Billing']. This query uses advanced syntax (XPath) because of the condition (we want the billing address). Therefore remember to enable the 'Use advanced syntax'-checkbox.
     
  4. Generate the document using the order-basic.xml. The result (partially displayed) should look like this:

    UseContext result

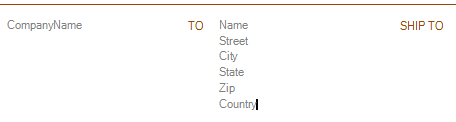
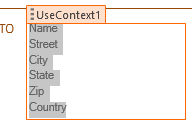
By using the UseContext-placeholder, its inner-placeholders are easier to configure, because of the shorter path-values, especially when using advanced queries. This is better for maintainability of the template.

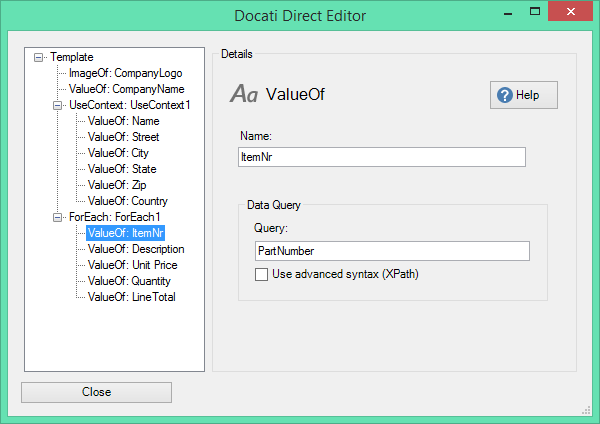
Tip: When placeholders are located close to each other or contained by other placeholders, the structure of the placeholders may get confusing, like with the UseContext or the ForEach placeholders in these exercises. In the image below, the ValueOf-placeholder is selected, but if you want to modify the settings of the surrounding ForEach-placeholder, it becomes hard to actually select it:

Placeholders overlapping/too close to eachother

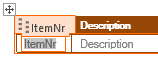
In this case it may help to add newlines or spaces inside table cells (and remove them afterwards if they mess up the final document).
Another solution is the “Direct Edit”-button on the Docati-ribbon. It will display the structure of the placeholders and allows you to modify their settings. It looks like this:

Using Direct-Edit

Continue with the next exercise >